
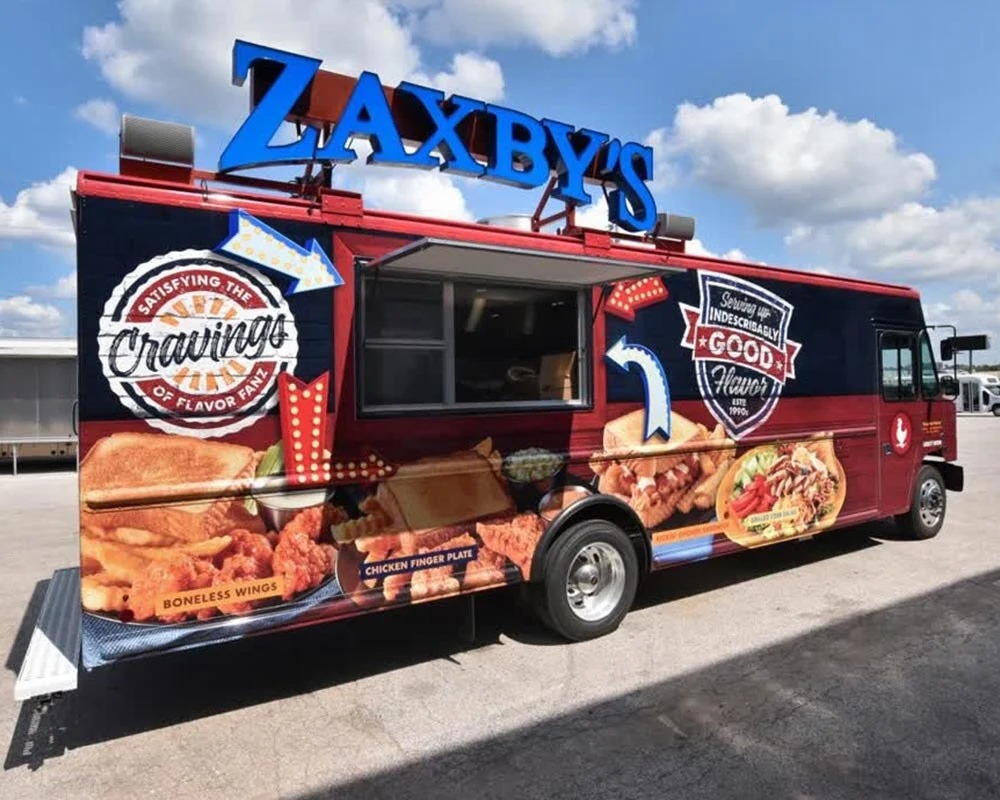
A fleet graphics transition is the structured process of replacing outdated vehicle branding with a new visual identity across every asset in your fleet. Because each wrapped vehicle generates tens of thousands of daily impressions at a fraction of digital advertising costs, a disorganized changeover turns your highest-reach media channel into a source of brand confusion.
This guide covers pre-transition auditing, rollout planning and design, removal and interim branding, cost expectations, and quality control through vertically integrated production.
A thorough audit establishes the foundation for every decision that follows. Cataloging each vehicle’s body type, graphic condition, and lease status determines which assets need full removal, which qualify for overlays, and which require specialized removable films to avoid return penalties.
Rollout planning and design lock in the timeline, stakeholder roles, and vehicle-specific templates that keep brand presentation consistent from cargo vans to semi-trailers. Aligning installation waves with your public brand launch date ensures high-visibility assets carry the new identity on day one while lower-priority units cycle through on a phased schedule.
Safe vinyl removal protects paint surfaces for clean reapplication, and interim solutions like magnetic signage or removable decals maintain a cohesive look on vehicles awaiting permanent wraps. Proactive customer communication during this window reinforces professionalism rather than raising questions.
Wrap costs range from roughly $2,500 for passenger vans to $8,000 or more for full semi-trailers, making phased budgeting essential for large fleets. Standardized print certifications and batch color verification prevent the visual drift that undermines cohesion across dozens or hundreds of vehicles.
A vertically integrated provider consolidates design, printing, and installation under one roof, eliminating handoff delays and compressing project timelines from concept through road-ready execution.
Why Does a Fleet Graphics Transition Matter During a Rebrand?
A fleet graphics transition matters during a rebrand because your vehicles are among the most visible brand assets your company operates. Every truck, van, and trailer displaying outdated branding actively contradicts your new identity, creating confusion for customers and undermining the investment behind the rebrand itself.
Fleet vehicles generate 30,000 to 70,000 daily impressions each, according to 3M. That volume means outdated graphics do not just look inconsistent; they broadcast the wrong brand message tens of thousands of times per day across every route, delivery zone, and job site your vehicles touch. A mismanaged transition turns your highest-reach advertising channel into a liability rather than a launch asset.
The financial stakes reinforce why this transition deserves strategic planning. Fleet graphics deliver a cost per thousand impressions (CPM) as low as $0.15, while online ads average $21 CPM. Few other media channels match that efficiency, which makes delaying the update particularly costly in terms of lost brand equity per dollar spent.
Beyond raw impressions, the perception gap is real. Consumers who encounter a mix of old and new branding on the road are likely to question whether they are dealing with the same company, a franchise, or a competitor. Brand consistency has been shown to increase revenue by 10 to 20 percent, so visual fragmentation across a fleet directly erodes the cohesion that drives recognition and trust.
For companies managing dozens or hundreds of vehicles, the transition also touches operations, compliance, and vendor coordination. Leased vehicles carry removal obligations. Regional fleets may require phased scheduling to avoid downtime. Design templates must adapt across sedans, cargo vans, box trucks, and semi-trailers without losing visual integrity. Each of these factors makes a structured plan essential rather than optional.
The sections that follow break down every phase of this process, from pre-transition audits and design considerations to rollout strategies, cost expectations, and quality control across large fleets.
What Should You Audit Before Updating Fleet Graphics?
You should audit your vehicle inventory, current graphic condition, and ownership status before updating fleet graphics. The sections below cover how to catalog every asset, assess existing wraps, and separate leased vehicles from owned ones.
How Do You Inventory Every Vehicle in Your Fleet?
You inventory every vehicle in your fleet by creating a centralized asset register that catalogs each unit’s make, model, year, body dimensions, and current graphic coverage. Every vehicle generates daily brand impressions on the road, so an incomplete count means missed branding opportunities or wasted materials.
Key data points to record for each vehicle include:
-
Vehicle identification number and license plate
-
Body type (sedan, cargo van, box truck, semi-trailer)
-
Current wrap coverage (full wrap, partial wrap, decals, or unbranded)
-
Assigned route, region, or department
-
Scheduled maintenance or replacement dates
For fleets of three or more vehicles, booking one to two weeks ahead allows proper design time and staggered installation that keeps the fleet operational. FedEx demonstrated this principle when applying new livery to 18 freighters under its One FedEx model, updating ground fleet vehicles on a rolling basis during replacements and body repairs to maintain operational availability. Starting with a complete, accurate inventory prevents costly surprises once production begins.
What Condition Are Your Current Wraps and Decals In?
The condition of your current wraps and decals determines whether vehicles need full removal, partial overlay, or surface prep before new graphics go on. Fading, peeling edges, cracking, and color shift all signal that existing vinyl has degraded beyond its useful life.
Walk each vehicle and document these indicators:
-
Visible lifting or curling at panel edges and seams
-
Color fading or yellowing compared to the original Pantone reference
-
Bubbling, cracking, or delamination across flat surfaces
-
Adhesive residue buildup around removed or damaged sections
According to Alwan Wraps, the Pantone Matching System provides precise color formulas that digital printers calibrate against regularly, making it the reliable benchmark for evaluating whether existing graphics still match your brand’s specified colors. Vehicles with severely degraded wraps typically require longer surface preparation, which directly affects your transition timeline and per-vehicle cost.
Which Vehicles Are Leased Versus Owned?
Leased vehicles require different graphic materials and removal strategies than owned vehicles. Lease agreements typically include return-condition clauses that penalize paint damage, adhesive residue, or surface alterations.
Separate your fleet into two categories:
-
Owned vehicles: Eligible for permanent vinyl wraps, paint, or heavy-adhesive decals with no return-condition restrictions.
-
Leased vehicles: Require ultra-removable graphic films designed to leave zero adhesive residue upon removal.
According to 3M, temporary changeable graphic films provide ultra-removability for leased vehicles while offering the same branding benefits as permanent wraps. Classifying each vehicle’s ownership status early prevents costly lease-return penalties and ensures your graphics partner specifies the correct materials from the start.
With your fleet fully audited, the next step is building a transition plan with clear timelines and stakeholder roles. Craftsmen Industries consolidates design, engineering, and production of large format graphics from a 127,000 sq. ft. facility in St. Charles, Missouri, allowing fleet managers to work with a single point of contact throughout the transition process.
How Do You Develop a Fleet Graphics Transition Plan?
You develop a fleet graphics transition plan by setting a realistic timeline, identifying stakeholders, and synchronizing the rollout with your brand launch date. The following subsections cover phased scheduling, team coordination, and launch alignment.
What Timeline Should You Set for a Phased Rollout?
The timeline for a phased rollout should span several weeks to several months, depending on fleet size and geographic spread. Phased rollouts keep fleets active by scheduling vehicles by region, location, priority, or route, preventing unnecessary downtime, according to Signature Graphics. High-visibility vehicles in major markets should be wrapped first, while lower-priority units follow in subsequent waves.
A practical approach groups vehicles into installation batches of two to four weeks each. This staggered schedule prevents operational bottlenecks by ensuring only a small percentage of the fleet is offline at any point. For most mid-size fleets, a three-to-six-month phased timeline balances speed with minimal service disruption.
Who Are the Key Stakeholders in the Transition Plan?
The key stakeholders in the transition plan include marketing leadership, fleet operations managers, procurement teams, and the graphics vendor. Marketing defines brand standards and approves design files. Fleet operations coordinates vehicle availability and scheduling so daily routes remain covered. Procurement manages vendor contracts, budgets, and material sourcing.
Beyond these core groups, frontline drivers and regional managers need clear communication about scheduling, vehicle downtime, and any interim branding. Failing to loop in field teams early often creates confusion when vehicles appear with mismatched graphics during the transition window. A single project lead should own the master timeline and serve as the point of contact across all departments.
How Do You Align the Rollout With Your Brand Launch Date?
You align the rollout with your brand launch date by working backward from the public reveal to set production and installation milestones. According to BrandActive, Verizon launched its new identity through targeted campaigns starting with the first NFL game of 2015, converting high-priority assets quickly for ROI while replacing the majority of assets over a longer timeline. This approach ensures maximum-exposure vehicles carry the new brand on day one.
Magnetic signage and removable graphics can bridge gaps on vehicles awaiting permanent wraps, maintaining a cohesive look without adhesive residue. Pre-producing graphic kits weeks before launch day prevents last-minute bottlenecks. The most effective rollout plans treat the brand launch as an immovable deadline and build buffer time into every preceding milestone.
With the transition plan defined, the next step is designing graphics that perform across every vehicle type.
What Are the Design Considerations for New Fleet Graphics?
The design considerations for new fleet graphics include brand consistency, vehicle-specific adaptation, and precise color matching with appropriate materials. Each factor directly affects how the rebrand translates from concept to road-ready execution.
How Do You Ensure Brand Consistency Across All Vehicles?
Brand consistency across all vehicles requires a centralized brand style guide that specifies logo placement, typography, color values, and clear-space rules for every vehicle template. This matters because, according to Bynder’s rebranding statistics, brand consistency increases revenue by 10 to 20 percent, yet the average rebrand takes seven months, meaning fleet graphics must align with broader brand assets from the start.
A single design system should govern all fleet applications:
-
Standardized logo lockups scaled for each vehicle surface
-
Defined primary and secondary color palettes with exact PMS values
-
Minimum clear-space requirements that prevent logos from being cut by door seams or hardware
-
Approved typefaces and hierarchy rules for contact information and taglines
With 92% of consumers noticing wrapped vehicles and 85% recalling the brand afterward, even minor inconsistencies across a mixed fleet erode recognition. For large-scale rebrands, consistent execution at volume demands disciplined production workflows. Matching designs to individual vehicle templates, rather than forcing one layout onto every asset, keeps brand presentation sharp across the entire fleet.
How Should New Graphics Adapt to Different Vehicle Types?
New graphics should adapt to different vehicle types by creating vehicle-specific templates that account for each body style’s unique dimensions, curves, and obstructions. A design that works on a cargo van will not translate directly to a box truck or semi-trailer.
Key adaptation factors include:
-
Surface area differences between sedans, vans, box trucks, and trailers
-
Placement of handles, rivets, hinges, and corrugation that interrupt flat surfaces
-
Window coverage regulations that vary by vehicle class
-
Viewing distance, since semi-trailers are read from farther away than passenger vehicles
Each vehicle type needs its own measured template with designated zones for primary branding, secondary messaging, and legally required markings. Skipping this step leads to misaligned graphics, bubbling, and logos split by panel seams. Investing in accurate vehicle measurements before production saves costly reprints and ensures the rebranded identity reads correctly regardless of the asset it appears on.
What Role Do Color Matching and Material Selection Play?
Color matching and material selection play a critical role in maintaining visual uniformity across a rebranded fleet. According to Alwan Wraps, the Pantone Matching System provides precise color formulas that digital printers use as a calibration standard, matching Pantone colors with CMYK inks through regular printer calibration.
Material selection determines both appearance and longevity:
-
Cast vinyl conforms to curves and recesses on complex vehicle bodies
-
Calendered vinyl suits flat surfaces like trailer sides at a lower cost
-
Reflective and specialty finishes add distinction but require compatible laminates
-
Removable films serve leased vehicles that need adhesive-free return conditions
Without consistent color calibration between print runs, the same blue can shift noticeably from one batch to the next. Pairing the correct material with each vehicle type and surface condition prevents premature failure, peeling, and color fading. These decisions should be locked in during the design phase, not improvised during installation.
With design specifications finalized, the next decision is whether to rebrand the entire fleet at once or roll out in phases.
Should You Rebrand Your Entire Fleet at Once or in Phases?
You should rebrand your fleet based on budget, fleet size, and operational needs. A full rollout delivers instant brand consistency, while a phased approach minimizes downtime and spreads costs. The subsections below compare both strategies and explain how to prioritize vehicles.
What Are the Advantages of a Full Fleet Rollout?
The advantages of a full fleet rollout center on immediate brand unity. Every vehicle displays the new identity from day one, eliminating the visual confusion that mixed branding creates on the road. Customers, employees, and stakeholders see one cohesive message simultaneously.
A full rollout works best when:
-
The rebrand coincides with a high-profile launch event or campaign.
-
The fleet is small enough to wrap within a short production window.
-
Stakeholder alignment already exists across marketing, operations, and executive leadership.
According to Speak Agency, key stakeholders, including divisional managers, frontline employees, and executive leaders, should shape brand ambition rather than simply approve it. Securing that alignment early makes a compressed timeline realistic. For companies that can absorb the upfront investment, a full rollout is often the fastest path to measurable brand impact.
What Are the Advantages of a Phased Fleet Rollout?
The advantages of a phased fleet rollout include lower upfront costs, reduced operational disruption, and greater scheduling flexibility. According to Signature Graphics, phased rollouts keep fleets active by scheduling vehicles by region, location, priority, or route, preventing unnecessary downtime.
Spreading the project across weeks or months offers several additional benefits:
-
Budget allocation becomes manageable across multiple quarters.
-
Installation teams can refine techniques on early vehicles before scaling.
-
High-visibility vehicles get updated first while lower-priority units continue operating.
For most large fleets, a phased approach is the more practical choice because it balances brand urgency against the reality of keeping revenue-generating vehicles on the road.
How Do You Decide Which Vehicles to Prioritize First?
You decide which vehicles to prioritize first by evaluating visibility, geographic reach, and condition. Vehicles with the highest daily exposure should move to the front of the queue.
A practical prioritization framework includes:
-
Customer-facing routes: Vehicles operating in high-traffic markets or near competitors generate the most brand impressions.
-
Newest or best-condition vehicles: Wraps adhere better and last longer on well-maintained surfaces, maximizing your investment.
-
Leased vehicles nearing return dates: These need updated graphics before lease-end inspections or turnover deadlines.
-
Executive or event vehicles: Units representing leadership or attending trade shows carry outsized brand weight.
Once high-priority vehicles carry the new identity, the remaining fleet can cycle through installation during scheduled maintenance windows. With a prioritization strategy set, the next step is understanding how to safely remove old graphics before applying new wraps.
How Do You Handle Removal of Old Fleet Graphics?
Removal of old fleet graphics requires controlled techniques that protect the vehicle surface while clearing it for new branding. The process involves proper heat application, safe tool selection, and thorough surface preparation.
What Is the Proper Process for Removing Vinyl Wraps?
The proper process for removing vinyl wraps begins with applying consistent heat across the graphic surface using a heat gun set between 150°F and 200°F. Heat softens the adhesive, allowing the vinyl to peel away at a low angle without tearing. Installers should work in small sections, pulling slowly and steadily to keep the film intact.
After the vinyl is removed, adhesive residue typically remains on the paint. A citrus-based adhesive remover or isopropyl alcohol solution dissolves residue safely. The surface then requires a full wash and inspection before any new graphics are applied. Skipping this preparation step risks poor adhesion and premature failure of the replacement wrap.
Can Old Graphics Damage the Vehicle Surface During Removal?
Old graphics can damage the vehicle surface during removal when improper techniques are used. According to Precision Sign & Design, harsh solvents, abrasive cleaners, and metal scrapers damage paint during removal; plastic tools and heat guns are essential for safe removal.
Several factors increase the risk of surface damage:
-
Vinyl left on the vehicle well past its rated lifespan becomes brittle and bonds more aggressively to the paint.
-
Direct sun exposure during removal causes uneven heating that can lift clear coat.
-
Factory paint in poor condition prior to wrapping is more vulnerable to peeling during graphic removal.
Rushed surface preparation after removal compounds the problem. Poor surface prep causes misaligned graphics, bubbling, and logos cut by door seams on the new wrap. For large fleets, this makes professional removal and inspection a non-negotiable step before any reinstallation begins.
With old graphics safely cleared, managing brand inconsistency across the fleet becomes the next priority.
How Do You Manage Brand Inconsistency During the Transition?
You manage brand inconsistency during the transition by deploying interim branding solutions and maintaining clear customer communication throughout the rollout. The following subsections cover temporary graphics options and messaging strategies.
What Interim Branding Solutions Bridge the Gap?
Interim branding solutions bridge the gap by providing temporary, swappable graphics that keep vehicles branded while permanent wraps are produced and installed. Magnetic vehicle signs are one of the most practical options, costing $30 to $80 per pair for small panels or $80 to $200+ for larger versions, according to Custom Magnets Direct. These signs leave no adhesive residue and can be reused across multiple campaigns.
Other effective interim solutions include:
-
Removable vinyl decals that display the new logo over the old wrap
-
Partial overlays covering only the outdated brand elements
-
Windshield or bumper banners announcing the rebrand
For most fleet managers, magnetic signage combined with selective decal overlays strikes the best balance between cost and visual consistency during a phased rollout.
How Do You Communicate the Transition to Customers?
You communicate the transition to customers by aligning internal stakeholders first, then delivering a consistent external message. Key stakeholders include divisional managers, frontline employees, vendor managers, and administrative assistants, as reported by Speak Agency and BrandActive. Executive leaders should shape brand ambition, not just approve it.
Once internal alignment is set, effective external communication follows a clear sequence:
-
Notify key accounts and partners before vehicles begin changing
-
Add a brief “new look, same service” message to invoices, emails, and social media
-
Train drivers to answer customer questions about the updated graphics
-
Post before-and-after fleet photos to build anticipation
Proactive communication prevents confusion. When customers see mixed branding on the road, a well-timed explanation turns a potential concern into a brand-building moment, reinforcing professionalism during the changeover.
What Does a Fleet Graphics Transition Typically Cost?
A fleet graphics transition typically costs between a few hundred dollars per vehicle for partial graphics to $8,000 or more for full wraps on large assets. Costs vary by vehicle type, wrap coverage, and design complexity. The following sections break down pricing for single commercial vehicles, semi-trailers, and passenger vans or SUVs.
How Much Does It Cost to Wrap a Single Commercial Vehicle?
It costs between $2,500 and $6,000 to wrap a single commercial vehicle with a full vinyl wrap, depending on the vehicle’s size and design complexity. Cargo vans typically fall in the $3,500 to $6,000 range for complete coverage. Businesses that need temporary branding during a phased rebrand can opt for magnetic vehicle signs, which cost $30 to $80 per pair for small panels or $80 to $200+ for larger versions. These magnetic options last 3 to 5 years with periodic maintenance. According to industry data from Tricklidz, fleet graphics deliver a CPM as low as $0.15, making even higher upfront wrap costs exceptionally cost-effective over time. Regardless of format, SGIA standards help ensure high-quality materials and proper installation across the industry.
How Much Does It Cost to Wrap a Full Semi-Trailer?
It costs $4,500 to $8,000 or more to wrap a full semi-trailer, according to pricing data compiled by Lee’s Signs and USA Wrap Co. Box trucks fall in a similar range at $4,000 to $8,000+, while cargo vans run $3,500 to $6,000 for full wraps. Semi-trailers command higher prices because of their large, flat surface area and the labor hours required for precise panel alignment. For fleets with dozens of trailers, these per-unit costs compound quickly, which is one reason phased rollouts are popular during rebrands. Investing in quality installation on these high-visibility assets pays dividends; trailers travel highways daily, generating tens of thousands of impressions per vehicle.
How Much Does It Cost to Wrap a Passenger Van or SUV?
It costs approximately $2,500 to $5,000 to wrap a passenger van or SUV with a full vinyl wrap. Pricing sits below cargo vans and box trucks because of the smaller total surface area, though complex body contours on SUVs can increase labor time. Partial wraps or spot graphics reduce costs further, often landing between $1,000 and $2,500. For rebrand transitions involving mixed fleets, passenger vans and SUVs are often prioritized early because their lower per-unit cost allows teams to convert more vehicles within a tighter initial budget.
With costs mapped across vehicle types, the next step is ensuring consistent quality at scale.
How Do You Maintain Quality Control Across a Large Fleet?
You maintain quality control across a large fleet by enforcing standardized print and installation certifications and verifying color consistency between production batches. The following subsections cover required standards and batch verification methods.
What Print and Installation Standards Should You Require?
The print and installation standards you should require include third-party certification programs that validate installer competency and material handling. The 3M Certified Graphics Installation Company program, established in 1999 and administered by the United Applications Standards Group (UASG), sets a recognized industry benchmark for installation quality. Requiring this certification ensures every installer across your fleet rollout meets the same technical proficiency threshold, regardless of location.
Beyond installer credentials, your standards should address:
-
Material specifications from approved manufacturers for consistent film performance.
-
Surface preparation protocols documented before every application.
-
Post-installation inspection checklists covering edge sealing, bubble-free surfaces, and panel alignment.
For large rebrands spanning dozens or hundreds of vehicles, standardized requirements prevent the cumulative drift in quality that turns a cohesive fleet into an inconsistent patchwork.
How Do You Verify Color and Finish Consistency Across Batches?
You verify color and finish consistency across batches by implementing a structured proofing and measurement workflow at every stage of production. Color drift between print runs is one of the most common quality failures in fleet graphics, particularly when production spans weeks or months. Craftsmen Industries operates in-house large format printing capabilities with centralized quality control, enabling consistent color calibration and finish verification across extended production runs for fleet-scale projects.
Key verification steps include:
-
Calibrating digital printers on a fixed schedule using spectrophotometer readings against approved Pantone or brand-specific color targets.
-
Producing hard-copy proofs from each new ink or media lot before full production begins.
-
Comparing samples from different batches under standardized lighting conditions to detect shifts invisible on screen.
-
Documenting ICC profiles and print settings so every run replicates the same output environment.
Finish consistency matters equally. Gloss, matte, and satin laminates must match across all vehicles; mixing laminate types creates visible differences that undermine brand cohesion on the road.
With quality standards defined, a vertically integrated production partner can streamline enforcement from design through final installation.
How Can Vertically Integrated Large Format Graphics Simplify Your Fleet Rebrand?
Vertically integrated large format graphics simplify a fleet rebrand by consolidating design, printing, and installation under one provider, eliminating handoff delays between vendors. The subsections below cover how in-house workflows reduce transition timelines and the key takeaways for executing a successful fleet graphics transition.
Can In-House Design-Through-Delivery Reduce Fleet Transition Timelines?
Yes, in-house design-through-delivery can reduce fleet transition timelines by removing the coordination gaps that arise when multiple vendors handle separate stages. A single provider controls file preparation, color proofing, large format printing, and on-site installation within one production schedule.
According to Signature Graphics, centralized program management tools track production through installation, giving stakeholders clear visibility and enabling faster, informed decisions. This consolidated approach prevents the delays that surface when design files transfer between disconnected teams, proofs require re-approval across vendors, or installation crews receive materials without context on vehicle specifications.
Craftsmen Industries operates as a vertically integrated provider with in-house design, engineering, printing, and installation capabilities from a 127,000 sq. ft. facility. That end-to-end control means fleet rebrand projects move from ideation to creation without the scheduling bottlenecks that fragment multi-vendor workflows.
What Are the Key Takeaways About Transitioning Fleet Graphics During a Rebrand?
The key takeaways about transitioning fleet graphics during a rebrand center on planning, stakeholder alignment, and execution discipline:
-
Fleet rebranding requires strong project management covering budget, scope, vendor selection, cost controls, and realistic timeframes.
-
Clear communication about the repositioning strategy prevents customer confusion during the transition period.
-
A thorough vehicle audit, phased rollout schedule, and quality control standards protect both brand consistency and operational uptime.
-
Proper vinyl removal and surface preparation safeguard vehicle paint and ensure new graphics adhere correctly.
-
Interim branding solutions bridge visual gaps while the full rollout progresses.
-
Partnering with a vertically integrated provider like Craftsmen Industries consolidates design, production, and installation, reducing handoff errors and compressing project timelines.
According to Fleetio, successful fleet rebranding depends on managing budget, scope, vendor selection, cost, and timeframe as interconnected variables, not isolated decisions. Every stage covered in this guide, from pre-transition audits to quality verification, builds toward a rebrand that strengthens market presence without disrupting daily fleet operations.
