
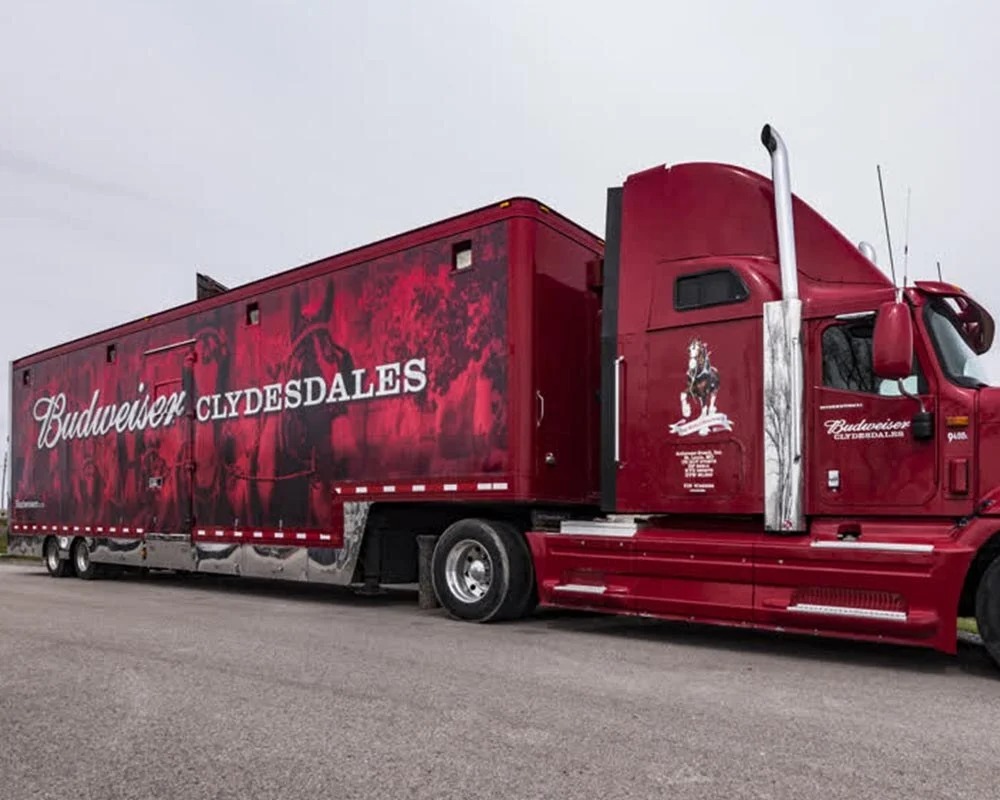
A fleet graphics brand style guide is a documented set of visual and technical standards that governs how every vehicle in a fleet displays brand elements. It locks down logo placement, color values, typography, imagery, and messaging so each vehicle reinforces the same identity on the road.
This guide covers core brand element documentation, vehicle-specific design adaptation, technical print specifications, placement zone mapping, and style guide ownership and enforcement.
Defining core brand elements starts with logo usage rules, Pantone and RGB color specifications, large-format typography standards scaled for highway viewing distances, and a messaging hierarchy that prioritizes instant recognition. Each element gets precise parameters so vendors and designers work from identical source standards.
Adapting those standards across vehicle types requires dedicated layout templates for box trucks, vans, sedans, and specialty vehicles. Surface area, body contours, and viewing angles vary dramatically between a 53-foot trailer and a compact sedan, so the guide specifies how logos resize, text reflows across panel seams, and partial wraps replace full coverage where the cost-to-visibility ratio demands it.
Technical specifications cover file format requirements, cast versus calendered vinyl selection, resolution minimums, and bleed settings that prevent color drift and costly reprints across production runs. Placement zone templates then map mandatory visibility areas, regulatory marking reserves for DOT and FMCSA compliance, and exclusion zones around windows and safety equipment.
Ownership falls to a designated brand manager who enforces a staged approval workflow from design submission through installation inspection. Annual audits and event-triggered reviews keep the guide current as vehicles rotate, materials evolve, and brand standards shift.
Why Does Your Fleet Need a Dedicated Brand Style Guide?
Your fleet needs a dedicated brand style guide because inconsistent vehicle graphics erode brand recognition and cost measurable revenue. The following sections explain how inconsistency damages perception and what return a unified program delivers.
How Does Brand Inconsistency Across Vehicles Hurt Perception?
Brand inconsistency across vehicles hurts perception by creating visual confusion that weakens recognition and trust. When fleet graphics vary in color, logo placement, or messaging from one vehicle to the next, the public encounters what appears to be multiple disconnected companies rather than a single cohesive brand.
This fragmentation compounds quickly across large fleets. A box truck displaying one logo treatment alongside a van with a different layout signals disorganization, which is particularly damaging for service-oriented businesses where professionalism drives purchasing decisions. According to Lucidpress, companies maintaining brand consistency across all platforms see revenue increases between 23% and 33%.
Every mismatched vehicle on the road is a missed opportunity to reinforce the identity your brand has worked to establish.
What ROI Does a Consistent Fleet Graphics Program Deliver?
A consistent fleet graphics program delivers ROI through high-volume impressions at an exceptionally low cost per exposure. Fleet vehicles function as mobile billboards that generate brand visibility continuously throughout their service life, and uniformity across the fleet multiplies that effect.
The financial case becomes clear when considering reach. Vehicle wrap advertising generates 40,000 to 70,000 daily impressions per vehicle, with a CPM of just $0.48, the lowest among all out-of-home advertising formats. A style guide protects this investment by ensuring every vehicle reinforces the same visual identity, compounding recognition with each impression rather than diluting it.
For fleet managers weighing the cost of developing formal brand standards, the math is straightforward: consistency turns each vehicle into a reliable brand asset rather than a visual liability. With the core brand elements defined next, building that consistency becomes systematic.
What Core Brand Elements Should a Fleet Graphics Style Guide Define?
A fleet graphics style guide should define logo usage, color specifications, typography standards, imagery treatments, and messaging hierarchy. The following subsections break down each core element.
How Should You Document Logo Usage and Placement Rules?
You should document logo usage and placement rules by specifying minimum size requirements, clear space boundaries, approved color variations, and exact positioning for each vehicle type. The style guide needs to include visual examples showing correct and incorrect applications.
Key elements to document include:
- Minimum logo dimensions for each vehicle class, ensuring legibility at highway speeds.
- Clear space requirements are measured relative to the logo’s height, preventing crowding by other design elements.
- Approved logo versions, such as full-color, single-color, and reversed (white) options for dark vehicle surfaces.
- Anchor placement zones on doors, rear panels, and cab sides where the logo must consistently appear.
Locking down these specifications prevents installers and regional vendors from improvising placements that erode brand recognition across the fleet.
What Color Specifications Should You Lock Down for Vehicle Wraps?
The color specifications you should lock down for vehicle wraps include Pantone Matching System (PMS) codes, CMYK builds, RGB values, and hex codes for every brand color. According to 1st Impressions’ artwork guidelines, vehicle graphic artwork should be submitted in RGB color mode, while vinyl lettering or decals require PMS Coated color values.
This dual-mode approach matters because printed wraps and cut vinyl reproduce color through fundamentally different processes. Without specifying both, the same shade of blue can shift noticeably between a digitally printed panel and a cut-vinyl door decal on the same truck. The style guide should also define acceptable tolerances for color variation, since outdoor exposure and different vinyl manufacturers can introduce subtle shifts over a wrap’s lifespan.
Which Typography Standards Apply to Large Format Fleet Graphics?
The typography standards that apply to large format fleet graphics center on font selection, minimum text height, weight restrictions, and hierarchy rules scaled for high-speed viewing distances. According to Impact Color, text height for large format applications is calculated by multiplying viewing distance in feet by 0.035; at 300 feet, the smallest text must be at least 10.5 inches tall.
Effective fleet typography standards should specify:
- Primary and secondary typefaces approved for vehicle use, favoring bold sans-serif families that maintain clarity on curved surfaces.
- Minimum stroke weight, since thin or condensed fonts become illegible when vehicles are in motion.
- Hierarchy tiers defining size relationships between the company name, phone number, URL, and secondary text.
Decorative or script fonts may look compelling in a digital mockup, yet they consistently fail on actual vehicles where readability at speed determines whether a message registers.
How Do You Standardize Imagery and Graphic Treatments Across a Fleet?
You standardize imagery and graphic treatments across a fleet by establishing approved photo styles, illustration guidelines, icon libraries, and graphic pattern rules within the style guide. Every visual asset should follow consistent parameters for resolution, cropping, color treatment, and placement.
Core standards to define include:
- Photography style, specifying lighting tone, subject framing, and whether lifestyle or product-focused images are permitted.
- Icon and illustration sets with locked line weights and color fills that match the brand palette.
- Background treatments, such as approved gradients, textures, or solid color fields that unify the fleet’s visual identity.
- Resolution minimums to prevent pixelation on large vehicle surfaces where images are scaled significantly.
Providing a centralized digital asset library ensures that every vendor, designer, or regional office pulls from the same approved source files rather than improvising with outdated or off-brand visuals. Organizations managing complex fleet graphics programs often benefit from working with integrated providers who maintain centralized asset libraries and enforce brand standards across design, production, and installation phases.
What Tagline and Messaging Hierarchy Works Best on Vehicles?
The tagline and messaging hierarchy that works best on vehicles prioritizes one dominant message, supported by a clear information sequence ranked by visual weight. Drivers and pedestrians have only seconds to absorb content, so the hierarchy must be ruthlessly simple.
A proven messaging framework follows this order:
- Company name or logo receives the largest placement and highest contrast for instant brand recognition.
- Primary tagline or value proposition appears in the secondary tier, reinforcing what the company does or promises.
- Contact information, such as a phone number, website, or QR code, occupies the tertiary tier and should remain legible but not compete with the brand name.
- Regulatory or legal text, including DOT numbers or licensing information, takes the smallest approved size.
Each tier needs defined font sizes, approved placement zones, and maximum character counts to prevent overcrowded designs. With messaging hierarchy locked down, the next step is adapting these brand standards to different vehicle types and body configurations.
How Do You Adapt Brand Standards to Different Vehicle Types?
You adapt brand standards to different vehicle types by creating vehicle-specific layout templates that account for surface area, body contours, and viewing distance. The following subsections cover guidelines for box trucks, vans, sedans, and specialty vehicles.
How Do Guidelines Change for Box Trucks and Trailers?
Guidelines for box trucks and trailers change primarily around scale and layout. These vehicles offer large, flat panels that function as mobile billboards, allowing full-bleed designs with oversized logos and messaging. The style guide should specify maximum logo dimensions, minimum text heights for highway viewing, and placement rules for each panel (rear, curbside, streetside).
Because surface area is significantly greater, wrapping costs reflect this scale. According to LookupAPlate, larger vehicles such as trailers and box trucks are priced at $8.50 to $11.00 per square foot for wrapping. Templates should include designated zones for DOT numbers and legal markings so branding never competes with required compliance elements.
How Do Guidelines Change for Vans and Sprinters?
Guidelines for vans and sprinters change to address curved body panels, sliding doors, and rear door configurations. These vehicles have less uninterrupted flat space than box trucks, so the style guide should define how logos and text reflow across panel seams and door breaks.
Key adjustments include:
- Specifying a reduced logo size that remains legible on shorter side panels.
- Defining safe zones around door handles, mirrors, and fuel caps where graphics must not overlap.
- Setting rear door layouts that maintain design continuity when doors are open or closed.
Sprinter vans, with their taller side profiles, benefit from vertical messaging hierarchies that stack the logo above a tagline and contact information. This is one of the most versatile vehicle classes for fleet branding because it balances visibility with manageable wrap complexity. Custom fabrication shops with in-house large format printing capabilities can optimize van wrap designs by engineering templates that account for door mechanisms, body contours, and material stress points during the initial design phase rather than addressing these challenges at installation.
How Do Guidelines Change for Sedans and Light-Duty Vehicles?
Guidelines for sedans and light-duty vehicles change to prioritize simplicity and restraint. These smaller vehicles have limited surface area, complex curves around fenders and bumpers, and proportionally more glass, all of which restrict available branding space.
The style guide should address:
- A simplified design layout focusing on the logo, phone number, and URL only.
- Approved placement zones on doors, rear quarter panels, and rear windshields.
- Minimum font sizes recalculated for closer urban viewing distances.
Partial wraps or cut vinyl decals often replace full wraps on sedans because the cost-to-visibility ratio favors targeted graphic placement over full coverage. The guide should include approved partial-wrap templates for each sedan model in the fleet.
How Do Guidelines Change for Specialty or Oversized Vehicles?
Guidelines for specialty or oversized vehicles change to accommodate non-standard dimensions, irregular surfaces, and unique operational requirements. This category includes vehicles such as refrigerated trucks, tanker trailers, flatbeds, and custom-built experiential marketing vehicles.
Each specialty vehicle demands its own template because standard layouts simply do not transfer. The style guide should require:
- Custom measurement drawings for every unique vehicle profile.
- Defined graphic exclusion zones around equipment mounts, hydraulic components, or articulation points.
- Material specifications suited to extreme conditions, since specialty vehicles often face harsher environmental exposure.
For oversized or experiential vehicles, coordinating with the fabricator during the design phase prevents costly rework. With vehicle-specific templates established, the next step is defining the technical specifications that ensure print accuracy across every format.
What Technical Specifications Should the Style Guide Include?
The style guide should include file format requirements, color profile standards, approved material and finish specifications, and bleed, scale, and template rules. The following subsections break down each technical area.
Which File Formats and Color Profiles Ensure Print Accuracy?
The file formats and color profiles that ensure print accuracy depend on the graphic type. Full vehicle wrap artwork should be submitted in RGB color mode to preserve the widest color gamut during large-format digital printing. Vinyl lettering and cut decals, by contrast, require Pantone Matching System (PMS) Coated color values for spot-color precision.
Your style guide should specify these accepted file formats:
- Adobe Illustrator (.ai) or EPS for vector-based logos and text
- High-resolution TIFF or PSD for photographic elements
- PDF/X for press-ready composite files
Locking down both the color mode and the file type eliminates reinterpretation by different print shops, which is one of the fastest ways fleet graphics drift off-brand.
How Do You Specify Material and Finish Standards for Wraps?
You specify material and finish standards for wraps by documenting approved vinyl types, thickness ranges, adhesive characteristics, and finish options directly in the style guide. The two primary vinyl categories are cast and calendered film, and each serves a distinct purpose.
According to Arlon Graphics, cast films are manufactured for long-term use of 5 to 11 years with immeasurable shrinkage, while calendered film offers 0 to 5 years of durability and can shrink up to 1/4 inch. For fleet programs requiring multi-year consistency, cast vinyl is the safer specification. The guide should also define acceptable finishes, such as gloss, matte, or satin, so every vehicle in the fleet presents a uniform surface appearance regardless of when it was wrapped.
What Bleed, Scale, and Template Requirements Should You Set?
The bleed, scale, and template requirements you should set start with a minimum 2-inch bleed on all sides of the artwork at full scale. According to 1st Impressions’ vehicle wrap artwork guidelines, the recommended file resolution is 150 dpi at 100% scale with 2-inch bleed; the absolute minimum acceptable resolution is 100 dpi at the same scale.
Each vehicle type in the fleet needs a dedicated template that maps panel dimensions, door handles, fuel caps, and window cutouts. Designers should build artwork at 100% scale whenever possible to avoid interpolation errors during output. Standardized templates paired with locked resolution and bleed settings prevent costly reprints and ensure every wrapped vehicle matches the brand standard.
With technical specs defined, placement zones and layout templates translate these standards into on-vehicle reality.
How Do You Create Placement Zones and Layout Templates?
You create placement zones and layout templates by mapping every vehicle surface into defined areas for logos, contact details, legal markings, and safety clearances. The subsections below cover mandatory visibility zones, regulatory marking requirements, and how to balance branding with window and safety areas.
What Are Mandatory Visibility Zones on a Fleet Vehicle?
Mandatory visibility zones on a fleet vehicle are the high-impact surface areas where brand elements must appear on every vehicle, regardless of type or size. These zones ensure consistent recognition from multiple viewing angles.
The primary mandatory visibility zones include:
- Driver and passenger doors: The most viewed surfaces at eye level in traffic and parking lots.
- Rear panel or tailgate: Visible to following vehicles for extended periods during transit.
- Hood or front fascia: Captures attention from oncoming traffic and pedestrians.
- Upper rear quarter panels: Readable from a distance and unobstructed by adjacent vehicles.
Each zone should have a designated primary element, such as the logo on doors and the phone number or URL on the rear. Locking these assignments into the style guide prevents installers from improvising placement, which is one of the fastest ways fleet branding loses consistency across a growing vehicle count.
How Do You Handle Legal and Regulatory Marking Requirements?
You handle legal and regulatory marking requirements by identifying every jurisdiction-specific obligation before finalizing your layout template. Fleet vehicles often must display DOT numbers, USDOT identification, MC numbers, GVW ratings, and company legal names in prescribed sizes and locations.
Key steps for regulatory compliance in your style guide include:
- Reserve dedicated zones on cab doors or lower body panels exclusively for legally required text.
- Specify minimum type heights that meet federal and state mandates, typically a minimum of 2 inches for USDOT numbers.
- Document placement coordinates so legal markings appear in identical positions across every vehicle in the fleet.
- Separate legal text from brand graphics to prevent design revisions from accidentally obscuring compliance markings.
Building regulatory zones into the template from the start, rather than adding them as an afterthought, protects the fleet from citations while preserving design integrity.
How Do You Balance Branding with Window and Safety Clearances?
You balance branding with window and safety clearances by defining exclusion zones in your layout template that protect driver visibility and meet federal standards. According to the Federal Motor Carrier Safety Administration, windshields and side windows may be tinted as long as light transmission is not restricted to less than 70 percent of normal.
Practical guidelines for your style guide include:
- Mark all glass surfaces on the vehicle template with clear “no full-coverage graphic” boundaries.
- Use perforated window film only on rear and cargo-area windows, never on windshields or front side glass.
- Maintain unobstructed sightlines around mirrors, backup cameras, and lighting assemblies.
- Set a minimum setback distance of at least 2 inches from window edges to prevent peeling and maintain clean lines.
Treating safety clearances as non-negotiable template elements, rather than suggestions, prevents costly rework and liability exposure. With placement zones fully defined, the next step is establishing who owns and enforces these standards across your organization.
Who Should Own and Enforce the Fleet Graphics Style Guide?
The fleet graphics style guide should be owned by a designated brand manager or marketing lead with authority to approve every vehicle design. Enforcement depends on a structured approval workflow and a regular audit schedule.
How Do You Build an Approval Workflow for New Vehicle Graphics?
You build an approval workflow for new vehicle graphics by establishing a multi-stage review process that gates each design from concept through final installation. A clear chain of responsibility prevents unauthorized changes from reaching the production floor.
An effective approval workflow includes these stages:
- Design submission requires the designer to use approved templates, color profiles, and logo files from the style guide.
- Brand review assigns the brand manager to verify layout, typography, and placement against documented standards.
- Material verification confirms that specified films meet durability requirements; according to Arlon Graphics, cast films last 5 to 11 years with immeasurable shrinkage, while calendered films offer only 0 to 5 years of durability and can shrink up to 1/4 inch.
- Pre-production proof generates a printed color sample for final sign-off before the full run begins.
- Installation inspection checks the completed vehicle against the approved proof for accuracy.
Each stage should have a single accountable approver and a documented turnaround time. Skipping steps is one of the fastest ways to introduce inconsistency across a growing fleet.
How Often Should You Audit and Update the Style Guide?
You should audit and update the style guide at least once per year, with additional reviews triggered by specific events. Annual audits catch gradual drift in color accuracy, material performance, and vendor compliance before small deviations compound into visible inconsistency.
Beyond the annual cycle, these events should trigger an immediate review:
- A brand refresh or logo update changes any core visual element.
- New vehicle types enter the fleet, requiring additional layout templates.
- Material suppliers release updated product lines or discontinue approved films.
- Regulatory changes affect required markings or window coverage rules.
During each audit, compare installed graphics on a sample of vehicles against the current style guide. Document deviations, update specifications as needed, and redistribute the revised guide to all stakeholders. Treating the style guide as a living document, rather than a static PDF, is the most reliable way to maintain fleet-wide brand integrity over time.
With clear ownership and enforcement processes in place, the next step is recognizing what pitfalls to avoid.
What Common Mistakes Undermine Fleet Graphics Consistency?
The most common mistakes that undermine fleet graphics consistency include skipping a documented style guide, allowing ad-hoc design decisions, and neglecting version control across vehicle types. These errors compound over time, turning a fleet into a patchwork of mismatched branding that erodes public trust.
- Using screen colors instead of print color profiles. Designing in RGB without converting to the correct output profile for each production method causes visible color shifts between vehicles. Vinyl lettering requires Pantone Matching System (PMS) Coated values, while full wraps use calibrated RGB workflows.
- Ignoring vehicle-specific templates. A design that works on a box truck will not translate directly to a sedan or sprinter. Without dedicated layout templates for each vehicle class, logos get cropped, text falls into body lines, and proportions look inconsistent from one vehicle to the next.
- Specifying the wrong vinyl type. Calendered film can shrink up to 1/4 inch and lasts only 0 to 5 years, according to Arlon Graphics. When some vehicles receive cast film and others receive calendered, the fleet ages unevenly, creating visible quality gaps.
- Skipping a formal approval workflow. Without a defined review process, regional offices or franchisees make unauthorized modifications to layouts, fonts, or messaging hierarchies. Each unapproved change chips away at brand cohesion across the fleet.
- Failing to schedule regular style guide audits. Brand standards evolve, vehicles rotate in and out, and materials improve. A style guide that is never revisited becomes outdated within a single fleet refresh cycle, leading teams to improvise rather than follow current standards.
- Overlooking regulatory markings in the design phase. DOT numbers, FMCSA-required identifiers, and safety clearance zones often get treated as afterthoughts. When compliance elements are added post-production, they disrupt the intended design layout and create visual clutter.
Most of these mistakes share a root cause: treating fleet graphics as one-off projects rather than an ongoing brand system. A style guide only works when it is actively maintained, enforced through approvals, and updated as the fleet evolves. Partnering with a single provider who manages the full production lifecycle can eliminate many of these breakdowns before they start.
How Does Partnering with a Vertically Integrated Graphics Provider Improve Consistency?
Partnering with a vertically integrated graphics provider improves consistency by consolidating design, production, and installation under a single quality-control process. The following sections explain how unified capabilities protect brand standards and summarize the key takeaways for building your fleet graphics style guide.
Can In-House Design, Printing, and Installation Under One Roof Strengthen Your Fleet Brand Standards?
Yes, in-house design, printing, and installation under one roof can strengthen your fleet brand standards by eliminating the handoff gaps that cause brand drift. When separate vendors handle design, production, and application independently, color shifts, material substitutions, and placement errors compound across every vehicle. A vertically integrated partner controls each stage against a single style guide.
Craftsmen Industries operates from a 127,000 sq. ft. facility where design, engineering, large format printing, and installation happen in sequence. This integrated workflow means color profiles are calibrated once and carried through to the finished wrap, material specs stay locked to the approved standard, and installers reference the same templates the designers created. For fleet managers enforcing strict brand standards across dozens or hundreds of vehicles, that closed-loop process removes the inconsistencies that multi-vendor chains introduce.
What Are the Key Takeaways About How to Create a Fleet Graphics Brand Style Guide for Consistency?
The key takeaways about how to create a fleet graphics brand style guide for consistency center on documentation, technical precision, and disciplined enforcement. The essential actions include:
- Define every core brand element, including logo placement zones, Pantone and CMYK color values, approved typefaces, and minimum legibility sizes.
- Create vehicle-specific layout templates that account for body lines, windows, and regulatory markings across each vehicle class in your fleet.
- Lock down technical specifications for file formats, resolution, material grade, and finish so every print run matches the last.
- Establish a clear approval workflow and assign ownership so no vehicle enters service without sign-off against the guide.
- Audit the guide regularly and update it whenever the fleet adds new vehicle types or the brand evolves.
According to CI Hub, brand consistency can boost revenue by up to 23%, making a well-maintained style guide one of the most cost-effective investments a fleet operator can make. The cumulative effect of these steps is a fleet that reinforces brand recognition on every route, at every stop. For organizations managing complex, multi-vehicle programs, partnering with Craftsmen Industries provides the vertically integrated design, print, and installation capabilities needed to turn that style guide into consistent, on-road results.
